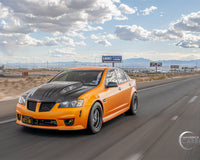
Thanks to Russ Rinfret below is his take on the Comparison and Install of the Maverick Man Carbon Chevy SS Spoiler.
I had always intended to paint my rear spoiler to match so when Maverick Man mentioned having a few blems that was all I needed to hear.
This is the OE rear spoiler

and Maverick Man's for comparison

As you can see, Maverick Man's is just slightly taller but much deeper thus it fit's the trailing line of the trunk much better and provides a more aggressive look.
Removal of the stock spoiler was quite simple. I soaked under the spoiler best I could with GooGone for maybe 10 minutes. While soaking I removed the inner trunk liner, pull handle, and the 10mm nut at the center of the spoiler. (keep in mind that 14s and some 15's have one stud in the middle and plastic clips. 16/17s have 3 studs) I then used the thinnest plastic pry tool I had and slid it under left end of the spoiler to break the tape and push in inserts free. Once up slightly I used fishing line on wooden handles to work my way from left to right with a gently from/back sawing while pulling up.

After removing the spoiler all I had left was to clean up the remaining double back tape.

To install Maverick Man's spoiler I used 3 rows of 1/2" wide double back tape (3M body tape) and the provided 3 threaded studs. The studs need M5x80 nuts (depending on version you have) and what I found best was to hot glue the nut to a fender washer so I could fish them in together and thread on as a pair. The inner most tail/backup light have to be removed to access the end most studs (or to install bolts depending on version you have) Once started on the thread, the hot glue is easy to break off with your fingers. A M8 ratchet box wrench aids in tightening the end most nuts - trust me.


To quote my wife.... "your done now, right" ??? "Nope".
Check out Russ Rinfret Full photo album here
Pre-Order yours here Chevy SS Maverick Man Carbon Spoiler.


