Thanks to customer Brian C. Bethany for doing this write up!
(We HIGHLY suggest having these professionally installed by a shop that is familiar with coilover installations. Keep in mind the warranty is only valid with proof of receipt from install at a shop. Install at your own risk regardless of below write up by customer).
See below for Brian C. Bethany's write up.
"I would preface this post with the fact that I am nowhere near a professional and I am learning as I go, on all things suspension. If there are any steps that are incorrect please let me know so I can change them."

"After you have removed the front struts, remove the bushings from the strut, make sure to use spring clamps!
The order they go back on":

A pic of the Whiteline bushing with the Whiteline bearing (I had ordered these before the coilovers)." If you have not ordered new bushings he highly recommend you do not use the stock bushings and order a Polyurethane such as shown here in the photos. You can order the Whiteline Bushing HERE.

"Put back together": (NOTE CORRECTION: Brain realized after he took the photos that the bearings are installed in the wrong order as shown in the photos below. The bearing (yellow and black piece) should be in the bushing and you should not be able to see when assembled. the order is should be in from to to bottom is bushing, bearing, the sleeve, then the spring.)

"Size difference":

"In this first video I describe how I set the spring load and ride height. The way I set ride though, was dumb haha, the fender was about 7 inches off the tire. So the second video shows how i set it using the of distance it sticks out of the bottom":
"I set mine to 1 3/4 inches for the fronts":

"After you get it set how you want it, put new coilover in":

"Moving to the rear, it is relatively straight forward so here are some pics":

"Take the plate off the top the OEM strut, and slide it onto the new coilover":

"Put new coilover in, where strut came out":

"Put new coilover in, where strut came out":

"To set ride height for the rear, I just measured both sides in the same spot and then adjusted to the heights matched.
Pics of car with them installed to follow soon hopefully".
Brian shows here what he did to adjust the height and the pre-load in this video
Well Brian did get everything on and he loves it! Here is is at the Autocross!
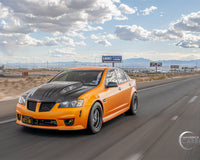
Again thanks to Brian C. Bethany for the summarized install and here is a beauty shot of his car with the Maverick Man Carbon Coilovers. Isn't it she beauty!


